
Counting foci from focus-forming assays (FociSpot) with Mabtech IRIS 2
Published: February 3, 2025
Updated: February 5, 2025
Authored by: Berend Bassleer
Say goodbye to manually counting foci!
With FociSpot in IRIS 2, you can instantly count foci—eliminating guesswork and ensuring consistency in your Focus-Forming Assays (FFA/FociSpot). The release of Apex™ 2.1 introduced a new FociSpot preset, Mabtech Clusters, created to improve accuracy in detecting more complicated foci morphologies. Understanding the parameters behind this preset, along with other available presets, is crucial to optimizing your analysis and obtaining reliable, reproducible data.
In this blog post, we’ll cover the key differences between the different FociSpot presets, the parameters for each, and provide practical tips for accurate and reproducible foci counting.
For a deeper dive into the FociSpot assay itself:
Choosing the correct preset for your assay


In the FociSpot assay principle there are three different presets, which will dictate how foci are counted, and what data is collected:
1. Mabtech Clusters: morphology-based algorithm
- Best for: counting clustered looking foci, e.g., foci formed after multiple rounds of infection.
- Data collected: number of foci, average foci size (µm2) and percentage area covered.


Cluster morphology foci from SARS-CoV-2 FociSpot
2. Mabtech Spots: RAWspot™-based algorithm
- Best for: counting of foci that have a 'spot'-like morphology, e.g., foci formed after a single round of infection.
- Data collected: number of foci, size and intensity.

Spot morphology foci from Influenza A FociSpot
3. Excluded: exclude uninterpretable wells
- Best for: wells that cannot give accurate foci counts, e.g., with artifacts or too many overlapping foci.
- Data collected: none.

Overlapping foci in FociSpot to be excluded in data analysis
Analyzing FociSpot plates
To start analyzing your FociSpot plates, select the appropriate plate type in the 'Assay Principle' screen: 'White Flat Bottom' or 'Clear Flat Bottom'.
Note: IRIS 2 is optimized for reading 96-well tissue culture plates from Corning and Nunc.


Then, select the wells that need to be read before clicking 'Read' in the top menu bar (or skip the selection of wells and simply press 'Read', if reading the whole plate.)

ELISpot plate reading
After the wells have been read, the following steps are to: exclude uninterpretable wells, adjust the Area of Interest, and assign the appropriate presets before counting foci:
- Exclude uninterpretable wells
- Select the uninterpretable wells to exclude from data collection by clicking on them (or click and drag if possible), and assign the 'Excluded' preset from the right-hand panel.
- Adjust the area of interest (AOI)
- Double click on a well in the 'plate overview' tab ('unnamed' in case the plate is yet to be saved) to open up the 'well view' tab (denoted as 'well ID', e.g., 'D7').
- Navigate through the wells that will be counted, and adjust the AOI when needed.
- Check the 'Edit area of interest' box.
- Adjust the AOI location by using the 'Detect' button, or drag the red-dashed circle (indicating the AOI) by dragging it to the center.
- Alternatively, reduce the AOI size if needed, and recenter the AOI via the 'Detect' button or by dragging the red-dashed circle to the center.
- Tip: use the arrow keys for faster navigation between wells.
- Select and assign the correct preset
- Navigate back to the 'plate overview' tab.
- Select the wells that you want to assign the preset to.
- Assign the appropriate preset based on foci morphology (see the section: Choosing the correct preset for your assay) from the right-hand panel.
- Note: to use multiple presets in the same plate, clone a preset and assign this to the relevant wells, then make changes to each preset separately (e.g., when different conditions are analyzed on the same plate).
- Count the foci
- Click 'Recount' to run the algorithms and count the foci with the default preset settings.
- After having optimized the preset parameters via the steps below, press 'Recount' again to apply the changes made to all wells.


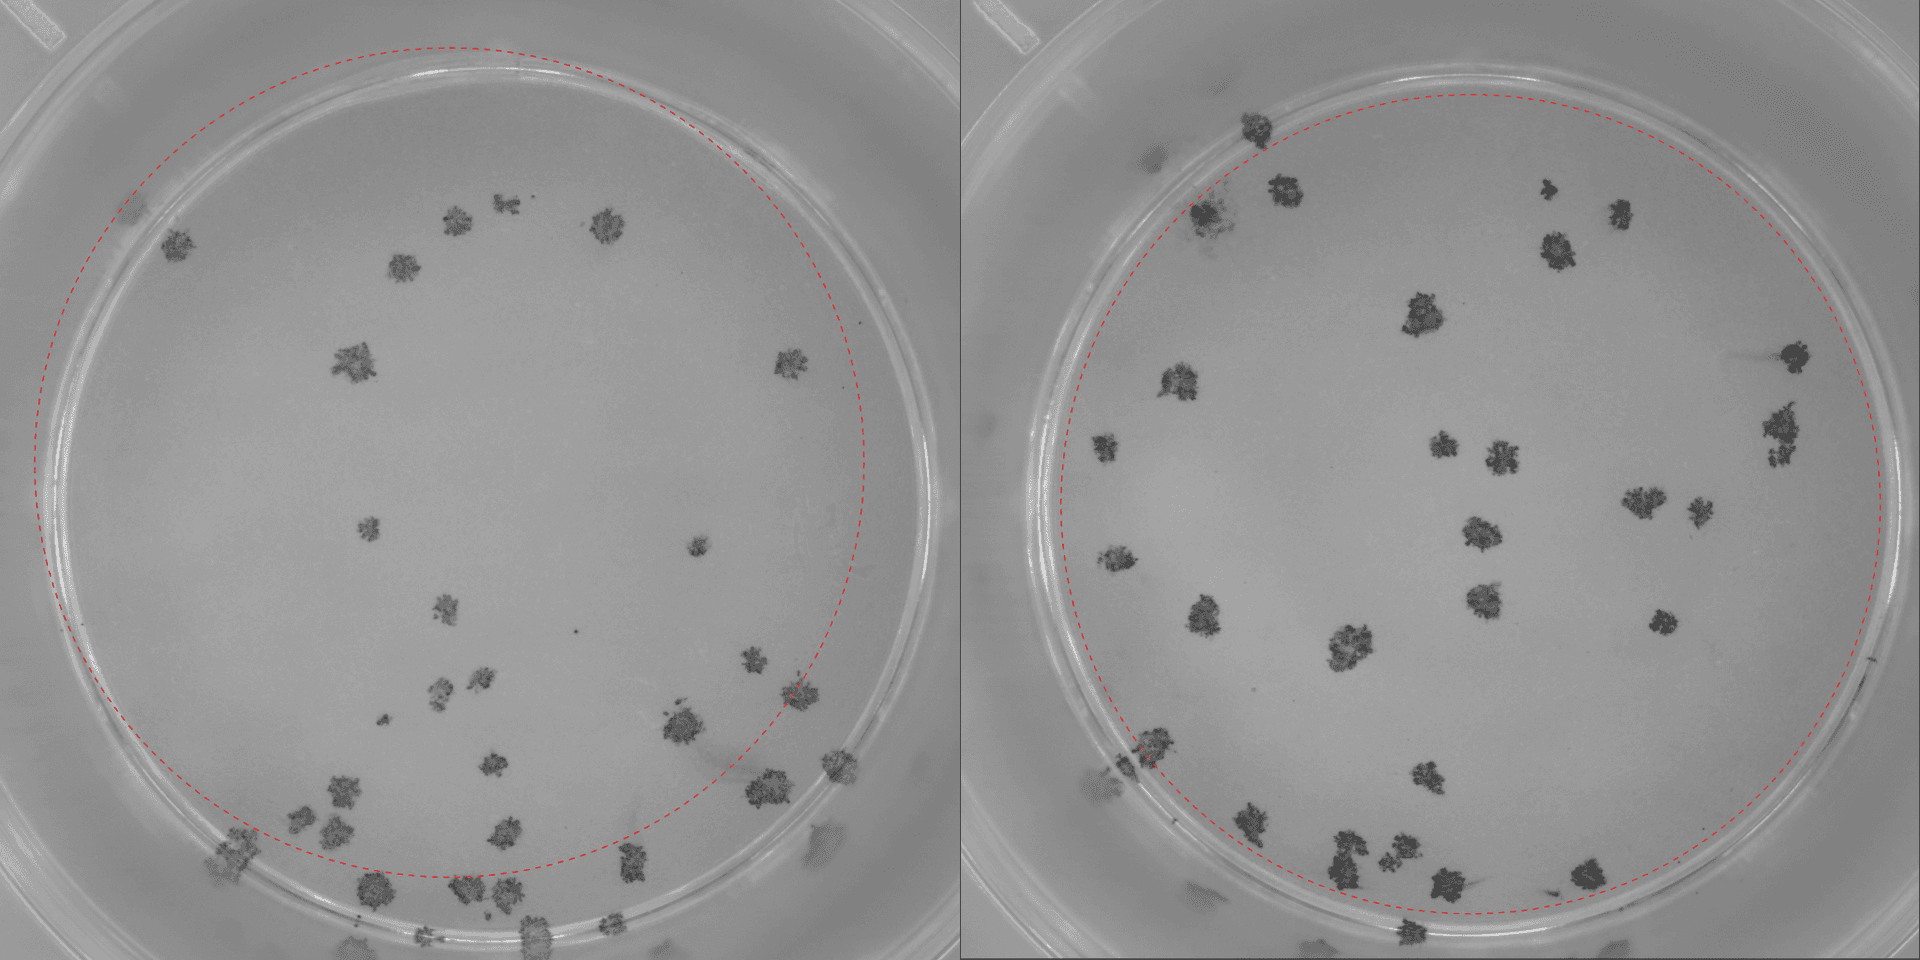
Incorrect AOI (left) vs correct AOI (right)
Now that the appropriate preset is assigned, uninterpretable wells are excluded, AOI is adjusted and an initial foci count has been applied, it is time to optimize the preset parameters.
Optimizing preset parameters
Navigate to a representative well of all other interpretable wells, i.e., a well that looks like the mean of all other wells that will have the same preset applied, and open its 'well view' (denoted by the well ID, e.g., 'D7') by double-clicking on the well in the 'plate overview' tab.
Mabtech Spot parameters
- Key settings:
- Size: defines the minimum size foci must have to be counted.
- Intensity: defines a minimum intensity value foci must have to be counted.
- Aesthetic adjustments:
- Brightness: adjusts the overall brightness of the image.
- Contrast: controls the difference in brightness between the light and dark areas.


- Guidelines for optimizing Mabtech Spot parameters:
- Set 'Size' and 'Intensity' to 1. (Note: this step can be skipped)
- Show all the foci that are being counted by selecting 'White LED' (or name of 'Analyte' in the preset).
- Identify the smallest focus you want to count, click on the red circle overlay to show its values, and set 'Size' and 'Intensity' parameters to the same values as this smallest focus. Or if this smallest identified focus is not picked up, adjust the 'Size' and 'Intensity' parameters until it is.
- Confirm settings in other wells, making adjustments to 'Size' and 'Intensity' as needed.
- Apply the adjusted parameters by clicking 'Recount' in the plate overview tab.
Mabtech Clusters preset
- Key settings
- What is considered a cluster
- Sensitivity: defines the number of objects from the background that should be counted, i.e., increasing sensitivity will increase the number of objects being counted.
- Specificity: defines the specificity towards the variation in a cluster, i.e., increasing the specificity will exclude more area from what is considered a cluster. Can be used to exclude gray smears, or membrane background that should not be counted.
- Min area: defines the minimum area for a cluster.
- Max area: defines a maximum area for a cluster.
- Splitting overlapping foci
- Split: can be turned on or off. Adjusting the parameter defines the amount of splitting that happens in a cluster. If turned on:
- Convexity (or 'split factor'): defines how much splitting occurs. i.e., by increasing this value, foci will be split in more and more separate foci.
- Size: defines the minimum size required for an area to be included in the splitting process. i.e., by increasing, smaller foci are merged with bigger foci.
- Split: can be turned on or off. Adjusting the parameter defines the amount of splitting that happens in a cluster. If turned on:
- Aesthetic adjustments
- Brightness: adjusts the overall brightness of the image.
- Contrast: controls the difference in brightness between the light and dark areas.
- What is considered a cluster


- Tips for optimizing Mabtech Clusters parameters:
- Show the clusters that are currently being counted by clicking 'White LED' (or name of 'Analyte' in the preset).
- Adjust the 'Sensitivity' parameter: increase in case too little signal of foci is being counted, decrease if too much background is being counted as foci.
- Adjust the 'Specificity' parameter: increase if too much background is picked up around the foci, decrease if more of the background around the foci needs to be counted.
- If foci are still being counted that are either very small or very big, then consider adjusting the 'Min area' and/or 'Max area' parameter to exclude small or big foci respectively.
- When there are overlapping foci, select the 'Split' button to split bigger areas into multiple smaller foci.
- Adjust the 'Convexity' parameter to adjust the amount of splitting that occurs.
- If the 'Convexity' parameter setting is in general okay, but small areas are still created out of a foci, set a minimum size for split foci via the 'Size' parameter.
- Verify these parameter settings in other wells, and adjust them if needed.
- Apply the adjusted parameters to other wells by clicking 'Recount' in the plate overview tab.

We also have a video guide on the parameters of the Mabtech Clusters preset, please watch the following webinar (skip to part 2, beginning at 21:40). The rest of the webinar is recommended to be watched in case you want to get more insights on how to set up your FociSpot assay in your lab:
As always, we are here to help you. In case you need assistance with your specific assay and choosing the right parameters, please reach out to us and we would be more than happy to help you out!